How to Use a Monotub Mushroom Kit: Step-by-Step Guide
Growing mushrooms with a monotub mushroom kit is a simple. Read our new Monotub grow kit guide to make it even simpler. Whether you’re a beginner or an experienced grower, this mushroom cultivation guide will help you maximize yields while minimizing contamination risks. By following this step-by-step mushroom cultivation guide, you’ll learn the best setup for growing mushrooms at home and achieve high-yield mushrooms with ease. Use these monotub setup tips to create the perfect environment for successful high-yield monotub mushroom cultivation.
What’s Included in Your Monotub Mushroom Kit
Your monotub mushroom kit contains everything needed to get started:
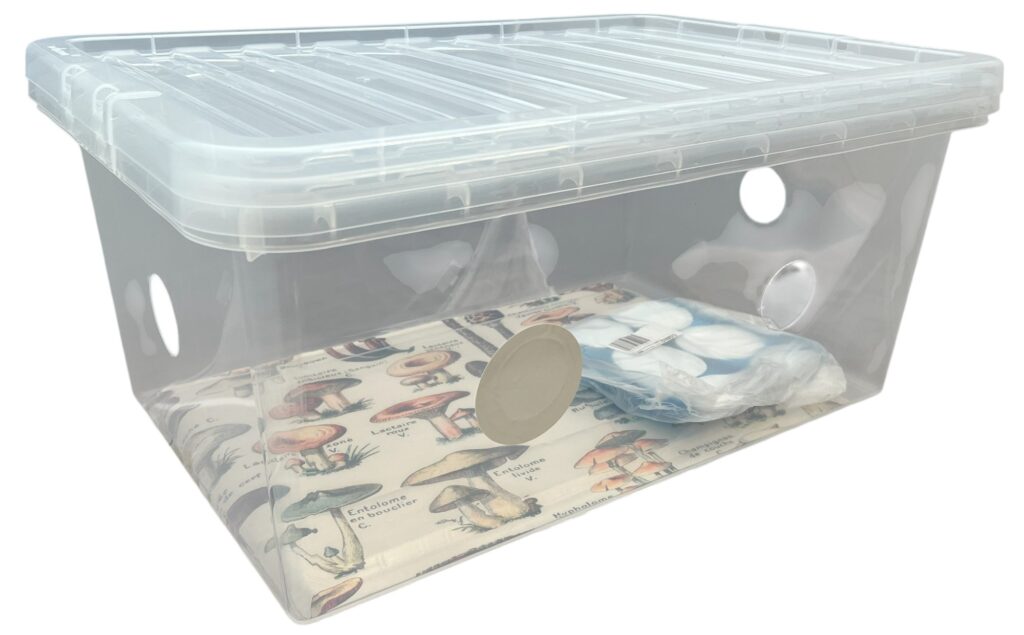
- 25L Monotub – A clear plastic container with pre-drilled, thermally cut holes and stick-on filter patches for optimal airflow and humidity control.
- All-in-One Monotub Mix – Pre-prepared and ready for inoculation with your chosen spores or liquid culture. This mix contains a balanced blend of rye grain, coco coir, vermiculite, and gypsum (CVG) to support healthy mushroom growth.
- Stick-On Filter Patches – Ensures proper air exchange while preventing contaminants.
- Black Plastic Liner – Prevents side pinning by blocking light from reaching the substrate edges.
If you’re new to how to grow mushrooms in a monotub, this kit includes everything you need to get started.
Additional Materials Needed
To complete the setup, you’ll need:
- Mushroom Spores or Liquid Culture – Purchase from a reputable source for your chosen mushroom variety.
- 70% Isopropyl Alcohol – Essential for sanitizing your workspace and tools.
- Latex or Nitrile Gloves – Helps maintain sterility.
- Spray Bottle – For misting and maintaining humidity levels.
- Digital Thermometer & Hygrometer – Monitors temperature and humidity inside the monotub.
Keeping a sterile environment is critical to prevent contamination and ensure a successful grow with your monotub mushroom kit.
Step-by-Step Monotub grow kit Guide
1. Inoculating the All-in-One Monotub Mix (10 Days)
- Sanitize Your Workspace – Wipe all surfaces with 70% isopropyl alcohol.
- Prepare the Mix Bag – Clean the injection port using an alcohol swab.
- Inoculate – Using a sterile syringe, inject 10-20cc of mushroom spores or liquid culture into the bag. Less can be used, but a higher amount speeds up colonization.
- Incubate – Keep the bag sealed in a warm, dark place (set incubator to 24°C-25°C) for 10 days. During this period, mycelium will develop and spread.
Following these monotub mushroom kit instructions ensures a strong foundation for a successful mushroom cultivation guide.
2. Mixing the Mycelium into the Substrate (10 Days)
- Sanitize Again – Clean all tools and surfaces.
- Mix Thoroughly – Massage the mycelium evenly throughout the substrate and place the bag back into the incubator.
- Repeat Mixing – After 5 days, mix again to promote even colonization.
- Final Incubation – After another 5 days, the substrate should be fully colonized and ready for the monotub.
3. Preparing the Monotub
- Apply the Black Plastic Liner – Line the inside of the tub to prevent side pinning.
- Attach Filter Patches – Place them over the pre-drilled holes to regulate air exchange.
A properly set-up monotub mushroom kit maintains the perfect balance of humidity and airflow, ensuring the best setup for growing mushrooms at home.
4. Transferring the Substrate into the Monotub
- Sanitize Again – Ensure everything is clean before handling the substrate.
- Break Up the Substrate – Massage the bag to eliminate large clumps.
- Pour into the Monotub – Cut open the bag and evenly distribute the fully colonized substrate.
- Level the Surface – Smooth it out to ensure even mushroom growth.
5. Incubating the Monotub (1-2 Weeks)
- Seal the Tub – Close the lid securely to maintain high humidity.
- Store in a Warm, Dark Place – Keep the temperature between 21-24°C for 1-2 weeks until the substrate is fully colonized and appears white.
Avoid disturbing the monotub mushroom kit during this period for high-yield mushrooms.
6. Initiating Fruiting Conditions
- Introduce Light – Place the monotub in an area with indirect sunlight or room light (4-6 hours daily).
- Increase Airflow – Slightly crack open the lid to boost oxygen levels and trigger mushroom pinning.
- Maintain Humidity – If levels drop, mist the tub’s inner walls, but avoid over-saturating the substrate.
Proper fresh air exchange and humidity are crucial for how to grow mushrooms in a monotub successfully.
7. Monitoring & Harvesting
- Observe Growth – Small mushroom pinheads should appear within a week.
- Harvest – Once mushrooms reach the desired size, gently twist and pull them from the substrate.
- Encourage Additional Flushes – Continue misting and maintaining conditions to allow multiple harvests.
Tips for Success
- Maintain Sterility – Always sanitize hands, tools, and surfaces to avoid contamination.
- Monitor Conditions – Use a thermometer and hygrometer to keep temperature and humidity in the ideal range.
- Be Patient – Mushroom cultivation takes time; avoid rushing the process or frequently disturbing the setup.
By following this step-by-step mushroom cultivation guide, you’ll create an ideal growing environment using the monotub mushroom kit. These monotub setup tips will ensure high-yield monotub mushroom cultivation with consistent and contamination-free harvests. Enjoy the process and happy growing!
